Help Center
How To Edit Your Profile
Now that you've created your Freedom Project account, you'd want to edit your profile. In this article, we'll teach you how to edit or update your details so that your correct information will be displayed in important places, such as your websites and follow-up emails.
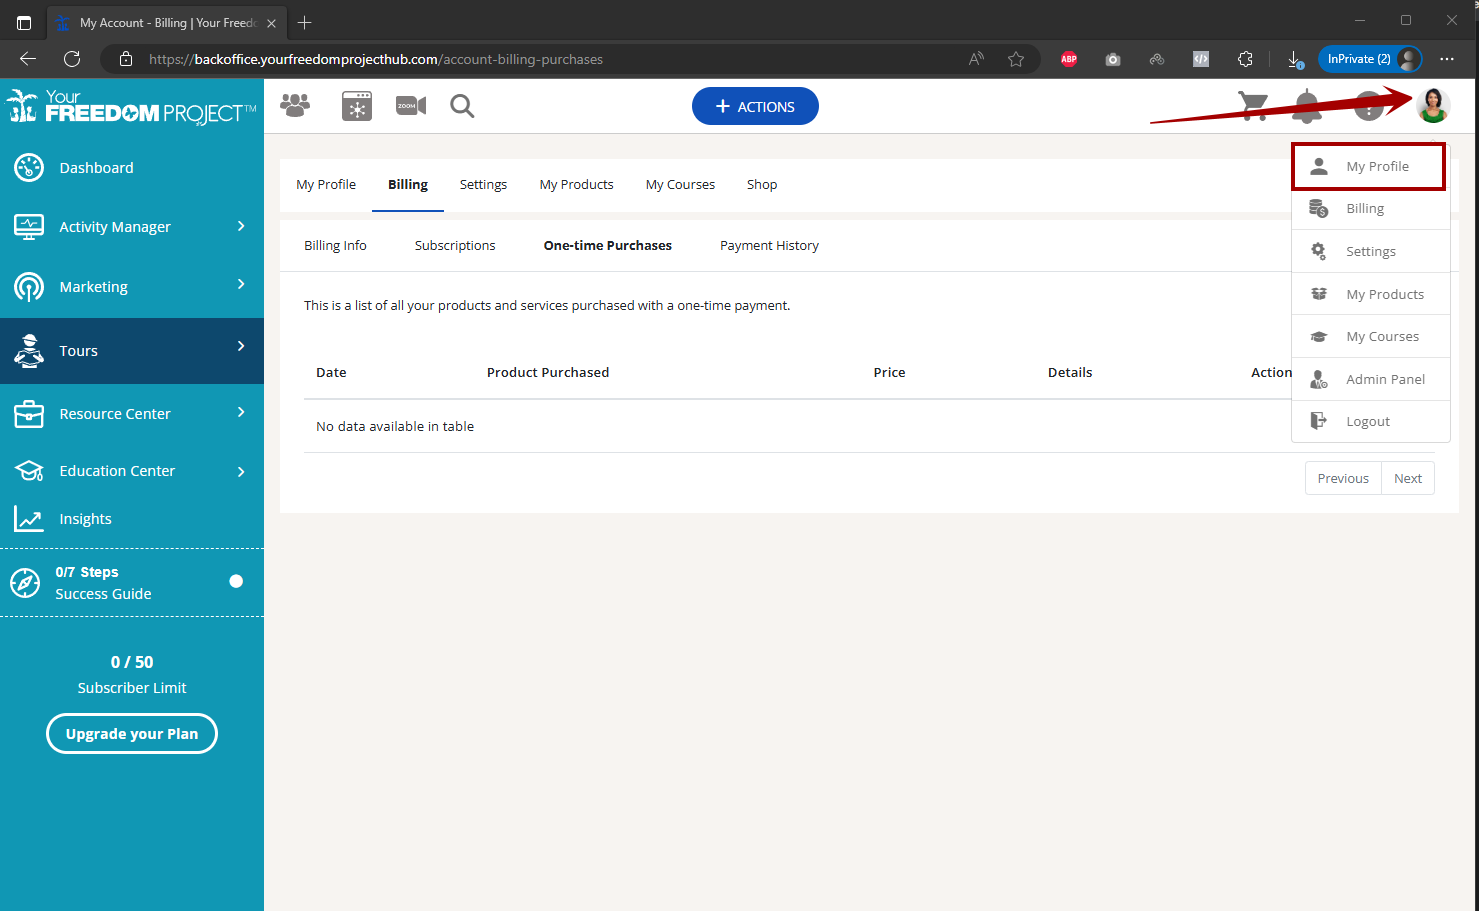
Log in to your account and click your picture.
Login Details
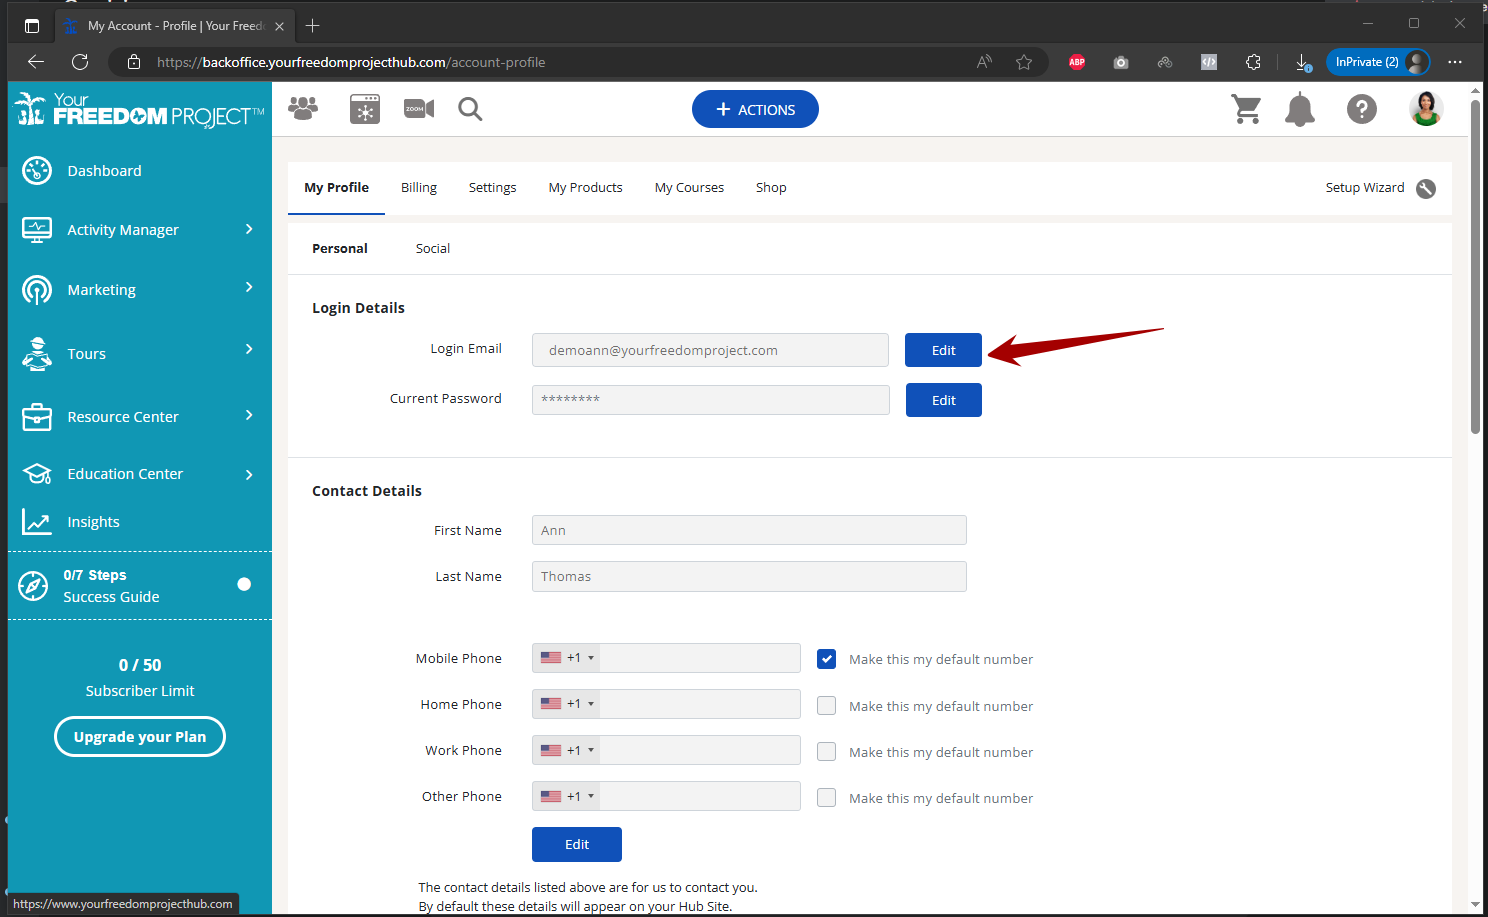
1. Click the Edit button to update or change your login email and password.
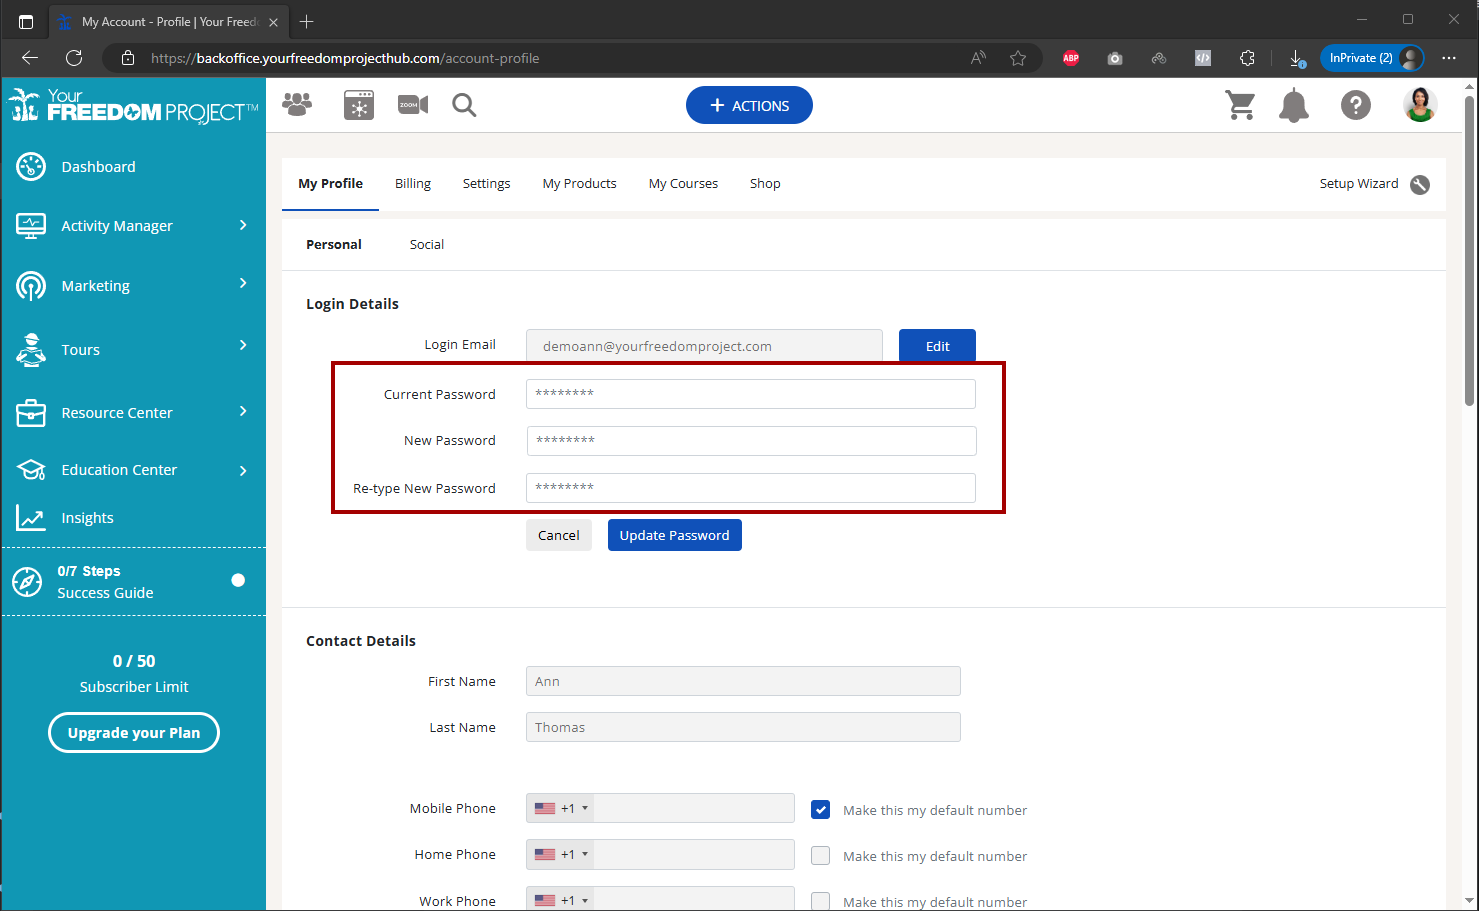
2. To change/update your password, you need to provide your current password to make the changes.
Contact Details
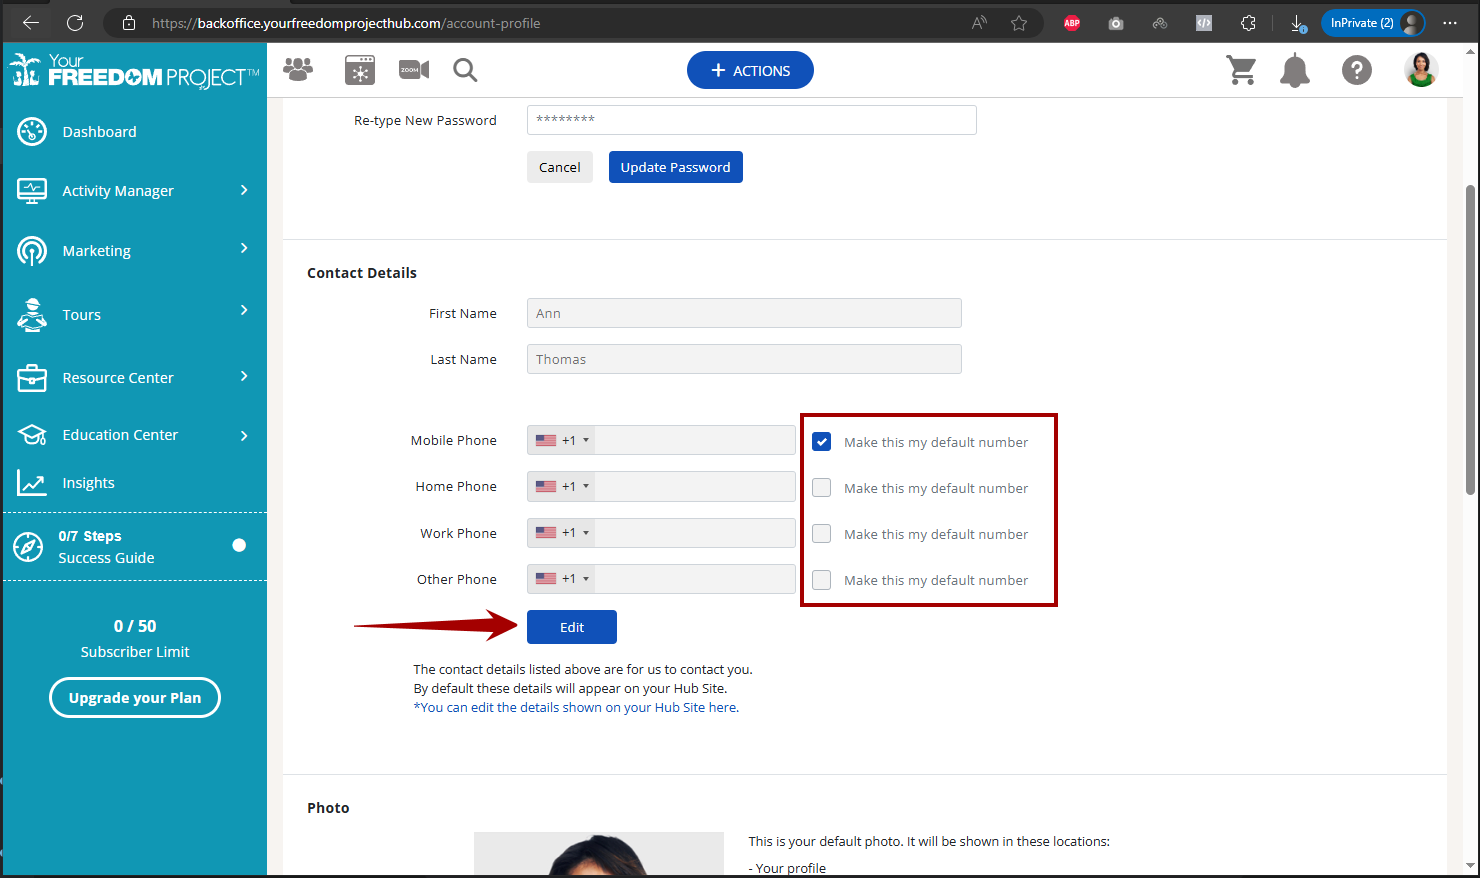
1. Click the Edit button to make changes on your phone numbers. You can also click the check box next to it to make it your default number.
Photo
1. Click on Add button if you don't have a photo yet. Click on Edit if you would like to change your photo.
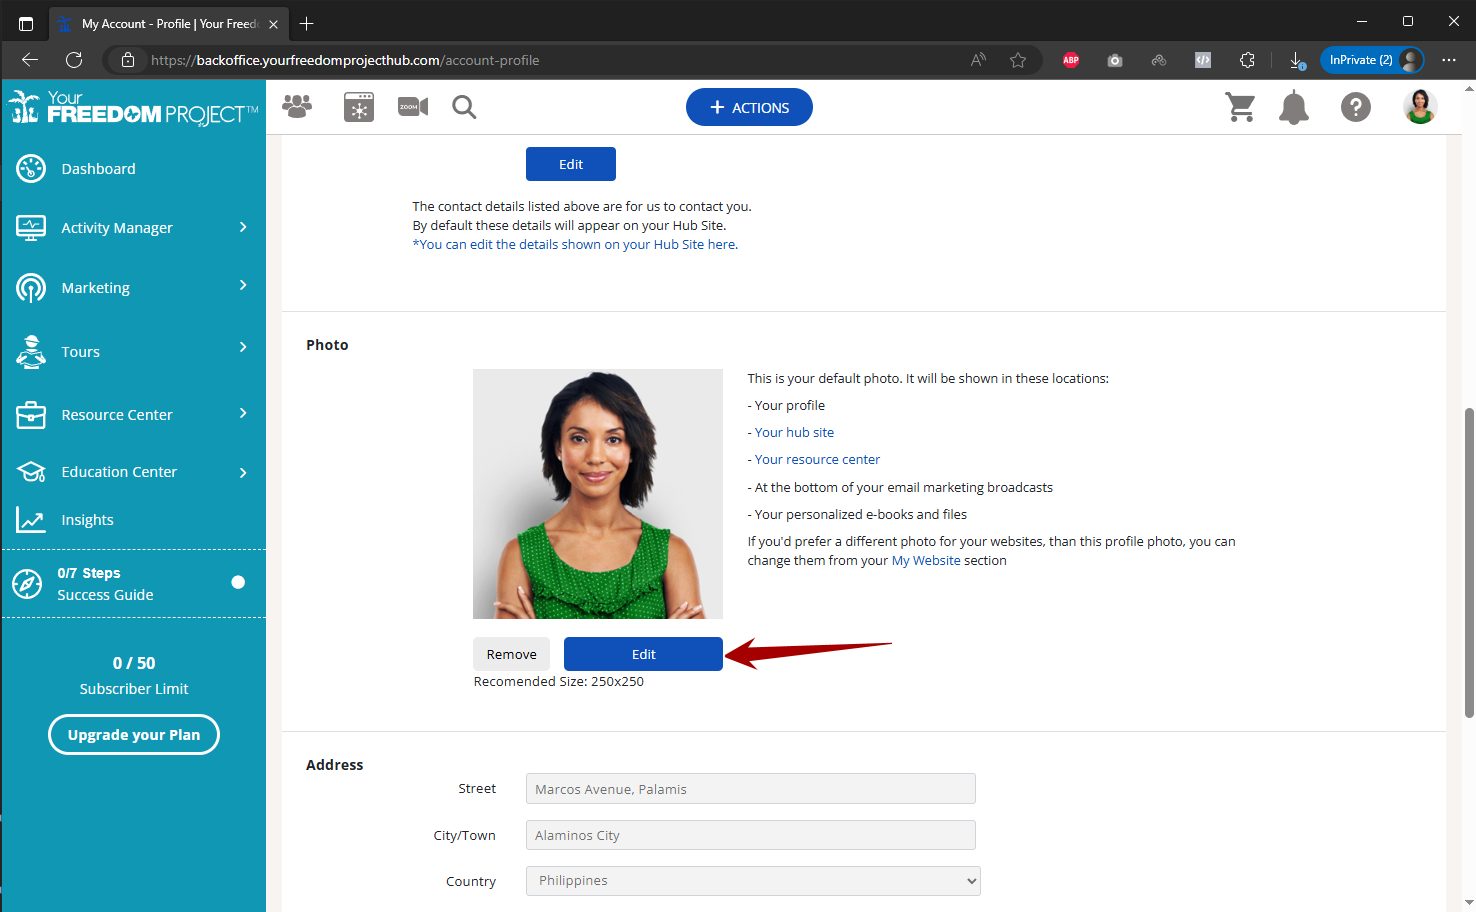
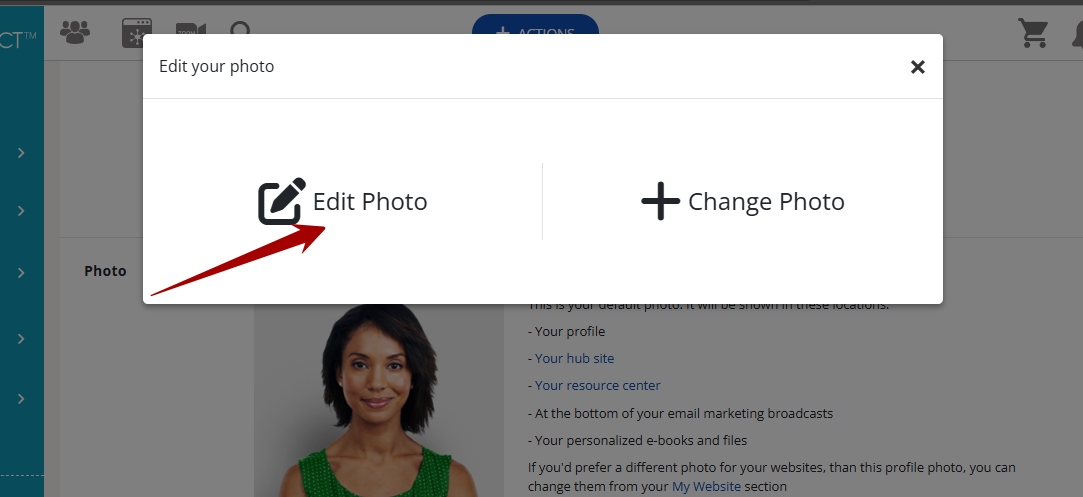
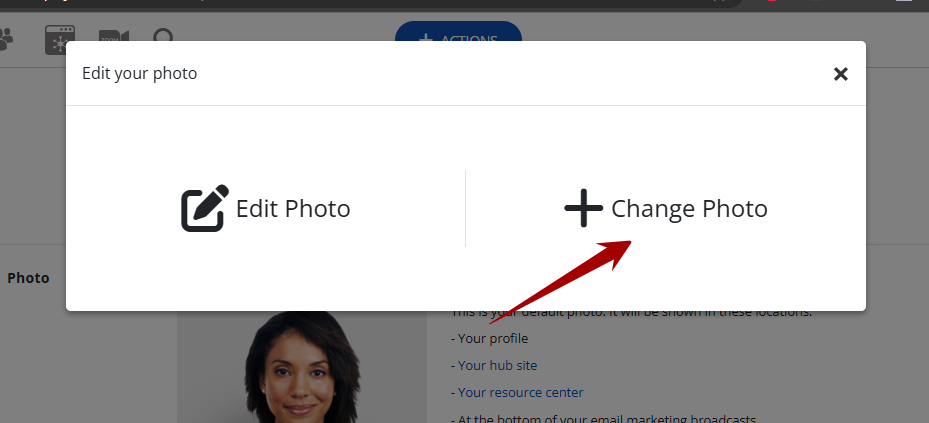
2. A pop-up will appear and will show two options. Edit Photo lets you adjust your current photo and Change Photo will let you replace your current photo.
Editing Your Current Photo
1. Click Edit to make changes or updates to your address.
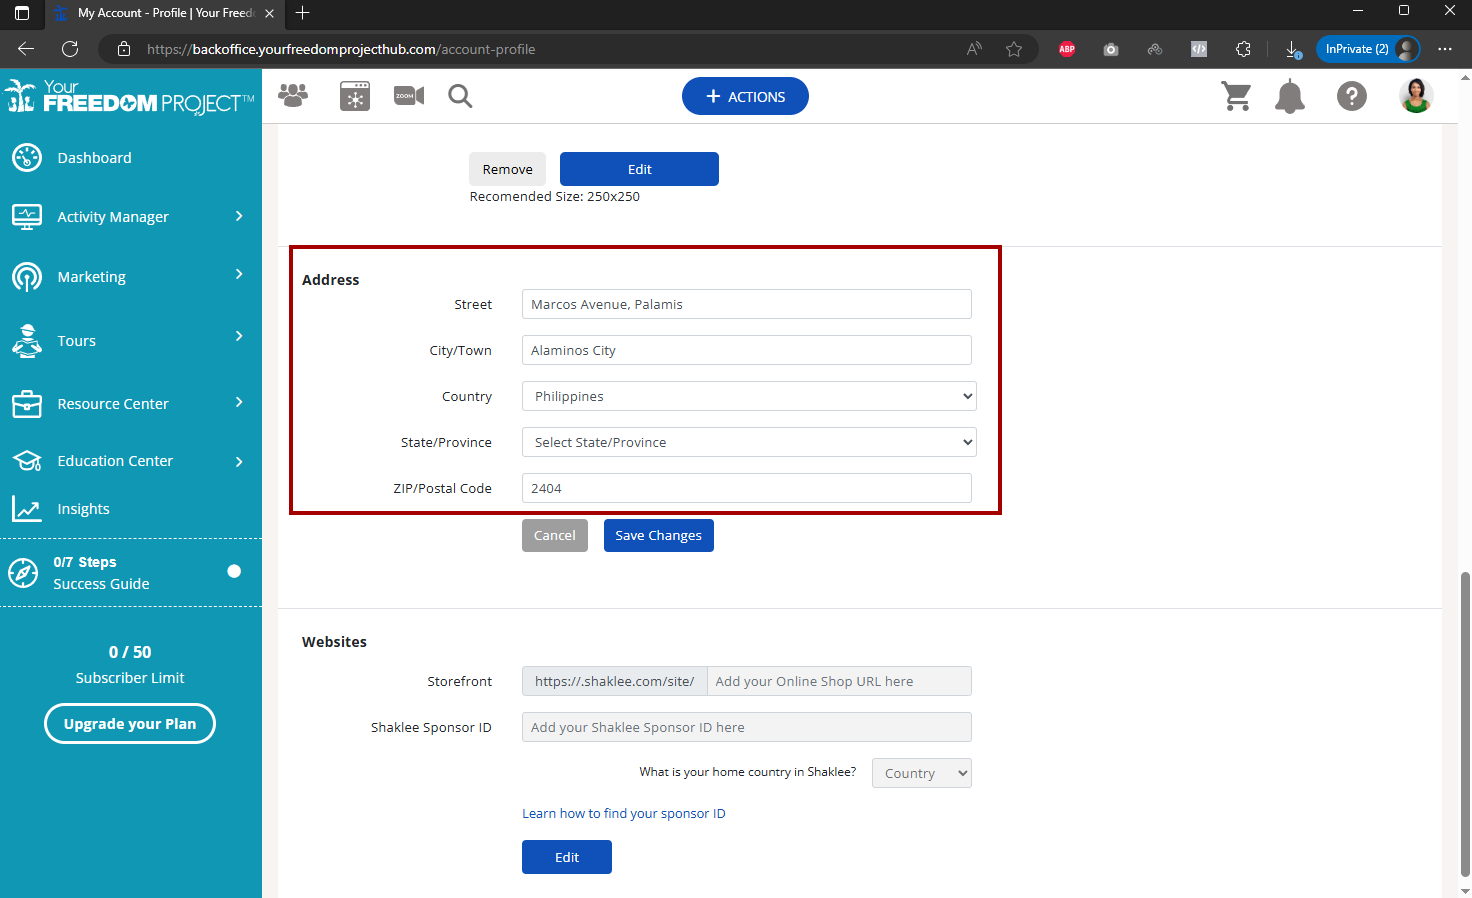
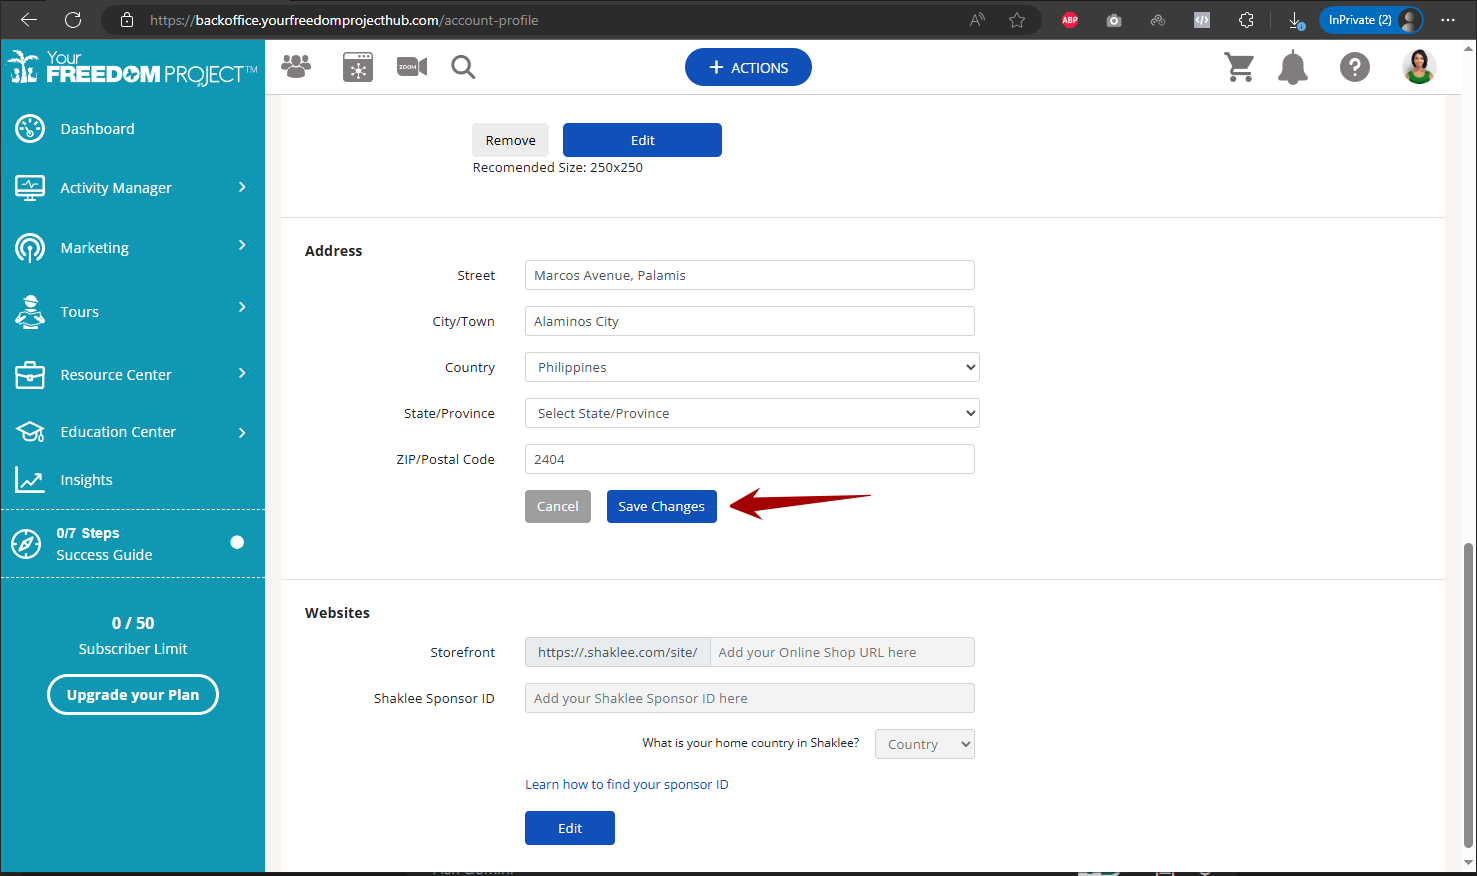
2. Once done, click Save Changes.
Website
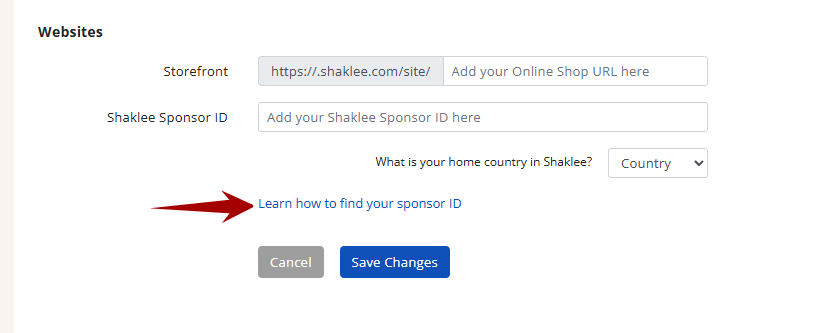
1. Click Edit to add/update your Shaklee Storefront URL, Sponsor ID and country.
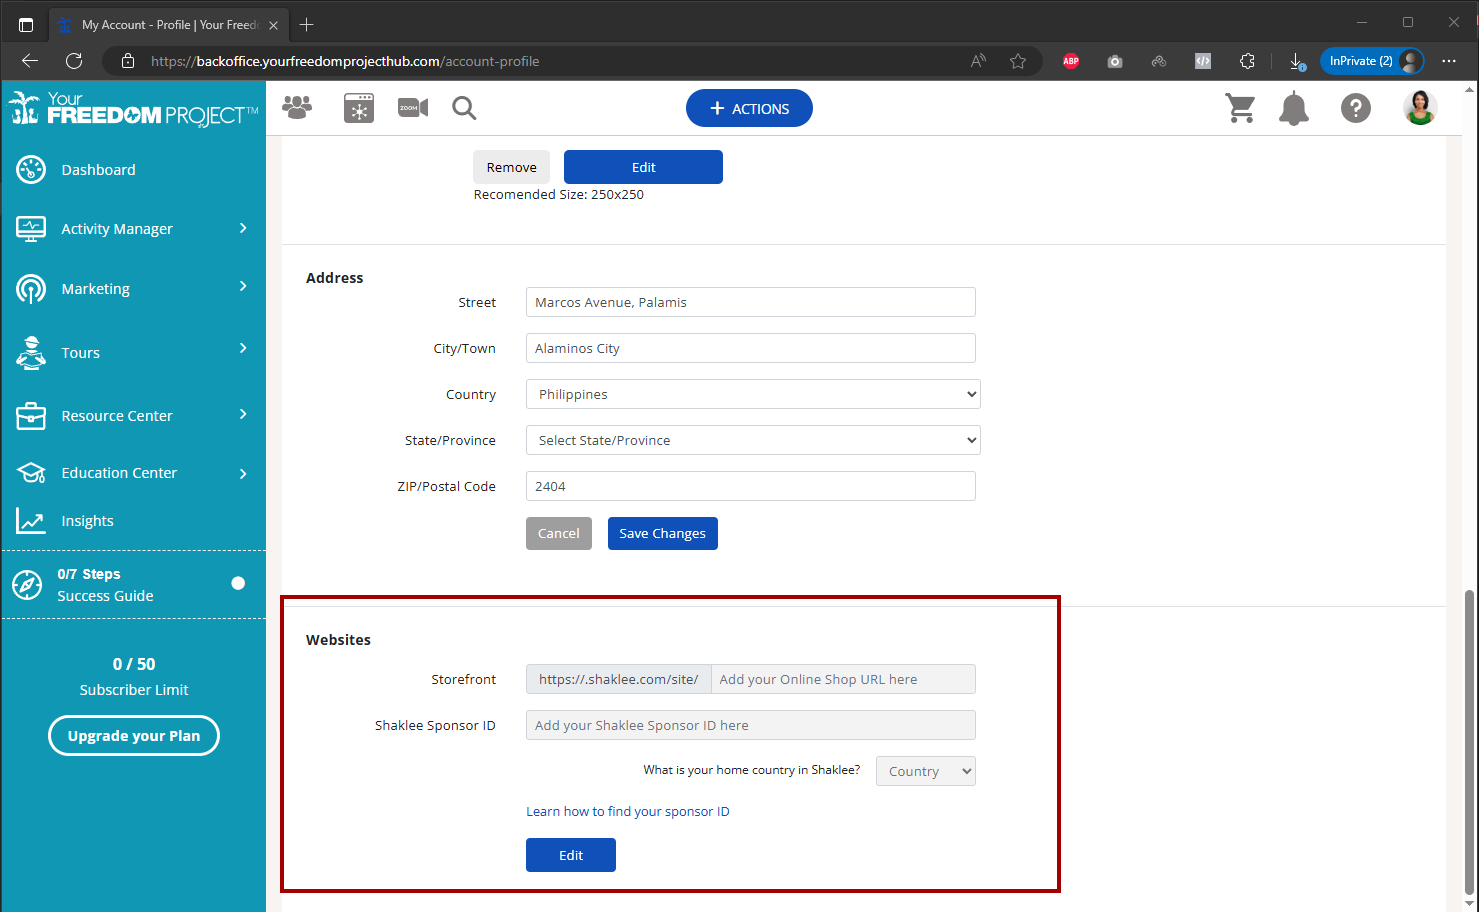
2. Click Learn how to find your sponsor ID if you're not sure on how to get your sponsor ID.
Log in to your account and click your picture.

Login Details
1. Click the Edit button to update or change your login email and password.

2. To change/update your password, you need to provide your current password to make the changes.

Contact Details
1. Click the Edit button to make changes on your phone numbers. You can also click the check box next to it to make it your default number.

Photo
1. Click on Add button if you don't have a photo yet. Click on Edit if you would like to change your photo.

2. A pop-up will appear and will show two options. Edit Photo lets you adjust your current photo and Change Photo will let you replace your current photo.
Editing Your Current Photo
- Click Edit Photo to adjust your current photo.
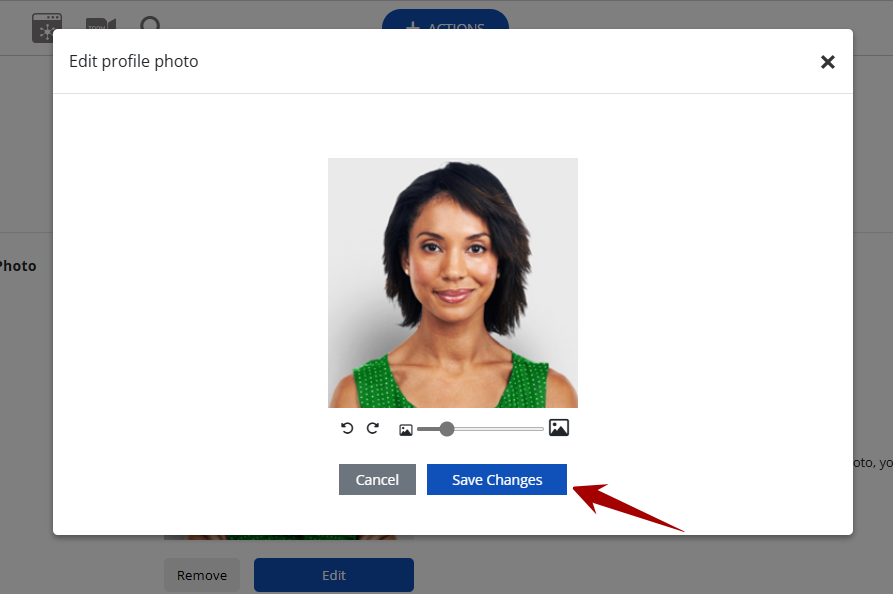
- Move the slider to zoom in and out of your photo. You can also drag the photo up or down to reposition the photo after zooming in.
- Click Save Changes to save your adjustment.
- Click Change Photo to replace your current photo.
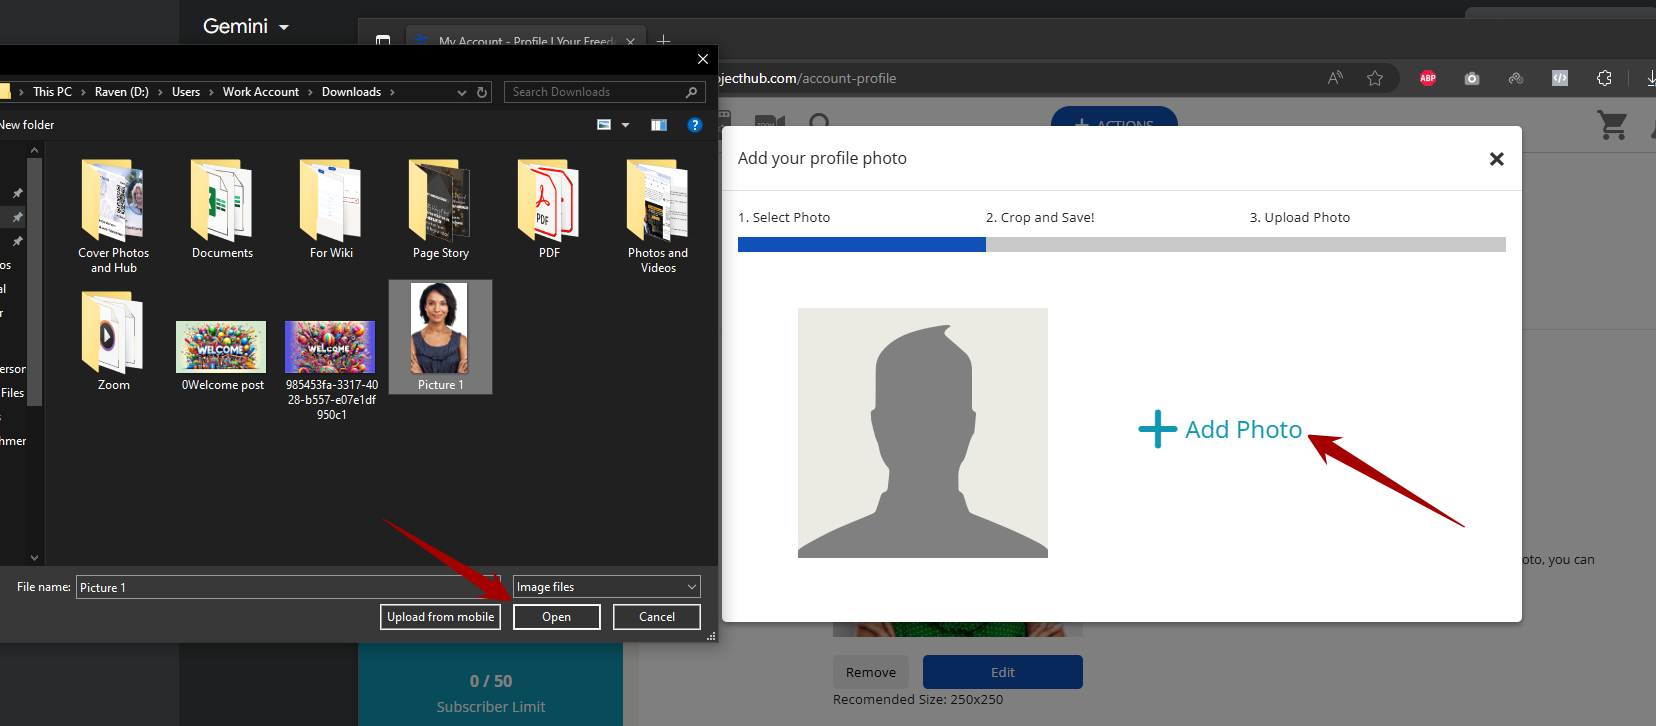
- Click Add Photo and locate your picture. Click your photo then click Open.
- Drag the slider to zoom in and out your picture. You can also drag the photo to reposition your picture. Once done, click Save Changes.
1. Click Edit to make changes or updates to your address.

2. Once done, click Save Changes.

Website
1. Click Edit to add/update your Shaklee Storefront URL, Sponsor ID and country.

2. Click Learn how to find your sponsor ID if you're not sure on how to get your sponsor ID.


